
A Beginner’s Guide to Shutter Speed, Motion Blur and Better Film Exposures
If you have recently picked up a film camera, the shutter-speed dial can initially look a little cryptic. Numbers such as 30, 60, 125, 250 and 500 do not immediately tell you what they do, and it can seem particularly confusing that the larger number actually represents the shorter exposure.
Once you understand the principle, shutter speed becomes one of the most useful controls on a film camera. It determines how long the film is exposed to light when you take a photograph, affecting both the exposure and the way movement appears in the finished image. A fast shutter speed can freeze a moving subject, while a slower speed can deliberately record movement as blur. Together with aperture and film ISO or ASA, shutter speed is one of the fundamentals of photographic exposure.
What Is Shutter Speed on a Film Camera?
Inside a film camera is a shutter that prevents light from reaching the film until you take a photograph. When you press the shutter release, the camera allows light through to the film for a controlled length of time before ending the exposure. Shutter speed is simply the duration of that exposure. An exposure of 1/1000 second is extremely brief, while an exposure lasting one second allows light to reach the film for much longer.
That difference has two important effects. A longer exposure allows more light to reach the film, but it also gives movement more time to be recorded. This is why shutter speed is both an exposure control and a creative control: it can help you achieve the correct exposure while also determining whether movement appears sharp, slightly blurred or deliberately exaggerated.
Understanding the Numbers on the Shutter-Speed Dial
A traditional 35mm film camera may have a shutter-speed dial showing a sequence similar to 1, 2, 4, 8, 15, 30, 60, 125, 250, 500 and 1000. Most of these figures represent fractions of a second. A setting of 60 means approximately 1/60 second, 125 means 1/125 second and 500 means 1/500 second. The 1 setting normally represents a full second, although the way whole seconds and fractions are displayed can vary between cameras.
| Dial setting | Exposure time |
|---|---|
| 1 | 1 second |
| 2 | 1/2 second |
| 4 | 1/4 second |
| 8 | 1/8 second |
| 15 | 1/15 second |
| 30 | 1/30 second |
| 60 | 1/60 second |
| 125 | 1/125 second |
| 250 | 1/250 second |
| 500 | 1/500 second |
| 1000 | 1/1000 second |
The easiest way to understand the sequence is to think in fractions. One five-hundredth of a second is much shorter than one sixtieth, so 1/500 is the faster shutter speed. As you move from approximately 1/60 to 1/125, 1/250 and 1/500, each step roughly halves the exposure time. Moving in the opposite direction roughly doubles it. Each of these changes represents approximately one stop of exposure.
The figures are not always mathematically exact because traditional shutter-speed scales use convenient standardised values, and some older cameras use slightly different sequences. What matters when taking photographs is understanding their relationship: moving towards 1/1000 gives progressively shorter exposures, while moving towards one second gives progressively longer ones.
How Shutter Speed Changes Exposure and Movement
Changing shutter speed changes the amount of light reaching your film. If you move from 1/125 to 1/250 second, the exposure time is approximately halved; move back from 1/250 to 1/125 and it approximately doubles. This predictable relationship allows shutter speed to work alongside aperture when balancing an exposure. For example, if your meter suggests 1/125 at f/8, you could potentially choose 1/250 at f/5.6 instead. The faster shutter admits less light, while opening the aperture compensates for that reduction.
Both combinations can provide a similar overall exposure, but the photographs may look different. Aperture affects depth of field, while shutter speed affects the way movement is recorded. Faster speeds such as 1/250, 1/500 and 1/1000 can help freeze children, animals, sports, moving vehicles and other active subjects. Slower speeds such as 1/30, 1/15, 1/8 and 1/4 allow more light to reach the film but give movement longer to register.
Blur is not necessarily a mistake. A slower shutter can soften moving water, create trails from vehicle lights or give a street photograph a deliberate sense of movement. The useful question is therefore not simply how to avoid blur, but whether you want to freeze movement or show it. You can explore the wider relationship between these controls in our guide to the exposure triangle.
Camera Shake, Subject Movement and Handheld Photography
There are two different types of movement to consider. Camera shake occurs when the camera itself moves during the exposure, while subject blur occurs when the person or object being photographed moves. A tripod can prevent the camera from moving, but it cannot stop a walking person, running dog or moving vehicle from changing position while the shutter is open.
There is no single shutter speed below which every handheld photograph suddenly becomes blurred. Your technique, focal length, camera, subject and how steadily you are standing can all make a difference. A traditional starting guideline for 35mm photography is to use a shutter speed approximately equal to or faster than the reciprocal of the lens focal length. With a 50mm lens, for example, around 1/60 second or faster is a sensible starting point; with a 135mm lens, 1/125 or 1/250 may be more appropriate.
This remains a guideline rather than a guarantee. Some photographers can hold a camera steadily at slower speeds, while moving subjects may demand much faster ones. As a practical starting point, general daylight photography often falls somewhere between 1/125 and 1/500, while 1/500 or 1/1000 can be useful for faster action where the available light permits. Speeds of 1/30 and below become increasingly useful when you deliberately want movement or are working with a supported camera in low light.
Shutter Speed, Aperture and Film ISO
Shutter speed does not operate in isolation. Aperture controls the size of the opening through which light passes, while the ISO or ASA rating describes the sensitivity of the film you have loaded. Changing one part of this relationship often means changing another if you want to maintain the same overall exposure. Suppose you have ISO 200 film loaded and your meter suggests 1/125 at f/8. If you decide that you need 1/500 to freeze movement, you have shortened the exposure by approximately two stops. To maintain a similar exposure you could, where the lens allows it, open the aperture by approximately two stops to f/4.
There is an important difference here between film and digital photography. Once ISO 200 film is in your camera, simply changing the ISO dial to 400 does not make the film physically more sensitive. On most film cameras, the ISO or ASA setting tells the metering system what speed of film you are using so that it can calculate exposure accordingly.
Using Your Camera's Light Meter
A light meter helps you judge whether your chosen combination of shutter speed and aperture is appropriate for the available light. On a fully manual camera, the meter may simply guide you: you might choose 1/250 because you want to photograph a moving subject, then adjust the aperture until the meter indicates an appropriate exposure. Automatic cameras can approach the same problem differently. In aperture-priority operation, for example, you choose the aperture and the camera's metering system determines the shutter speed.
This is why learning how shutter speed works is useful even when your camera often chooses it for you. You can recognise when the selected speed is likely to freeze movement and when it might introduce camera shake or subject blur. Our Film Camera Light Meters Explained guide looks more closely at how vintage camera meters work, how to read them and what to do if an old meter is no longer reliable.
Manual and Automatic Shutter-Speed Control
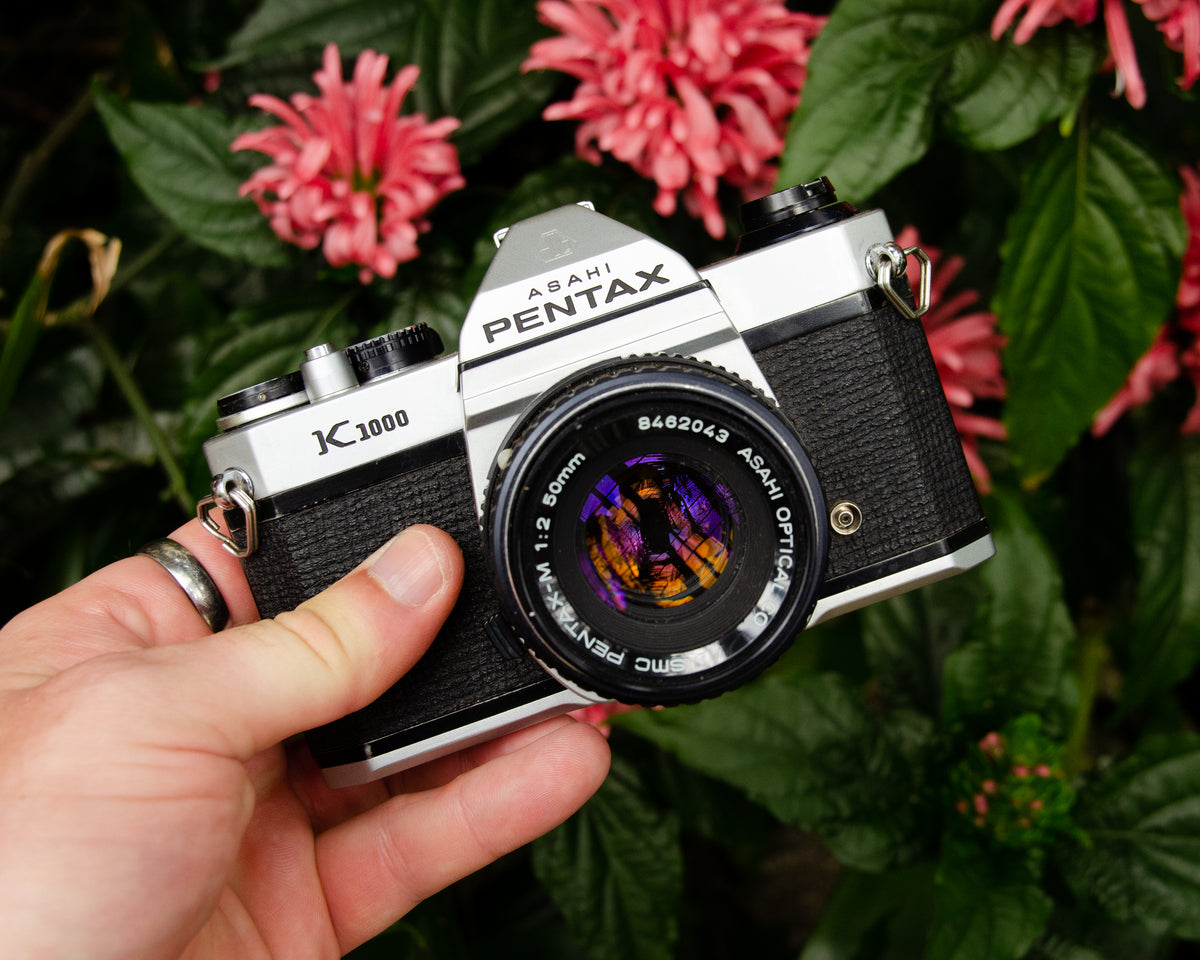
The Pentax K1000 is a useful example of direct manual exposure control. You choose both shutter speed and aperture, while its built-in light meter guides you towards an appropriate exposure. Because its shutter is mechanically operated, the camera can continue taking photographs without battery power; the battery is required for the meter rather than for normal shutter operation.
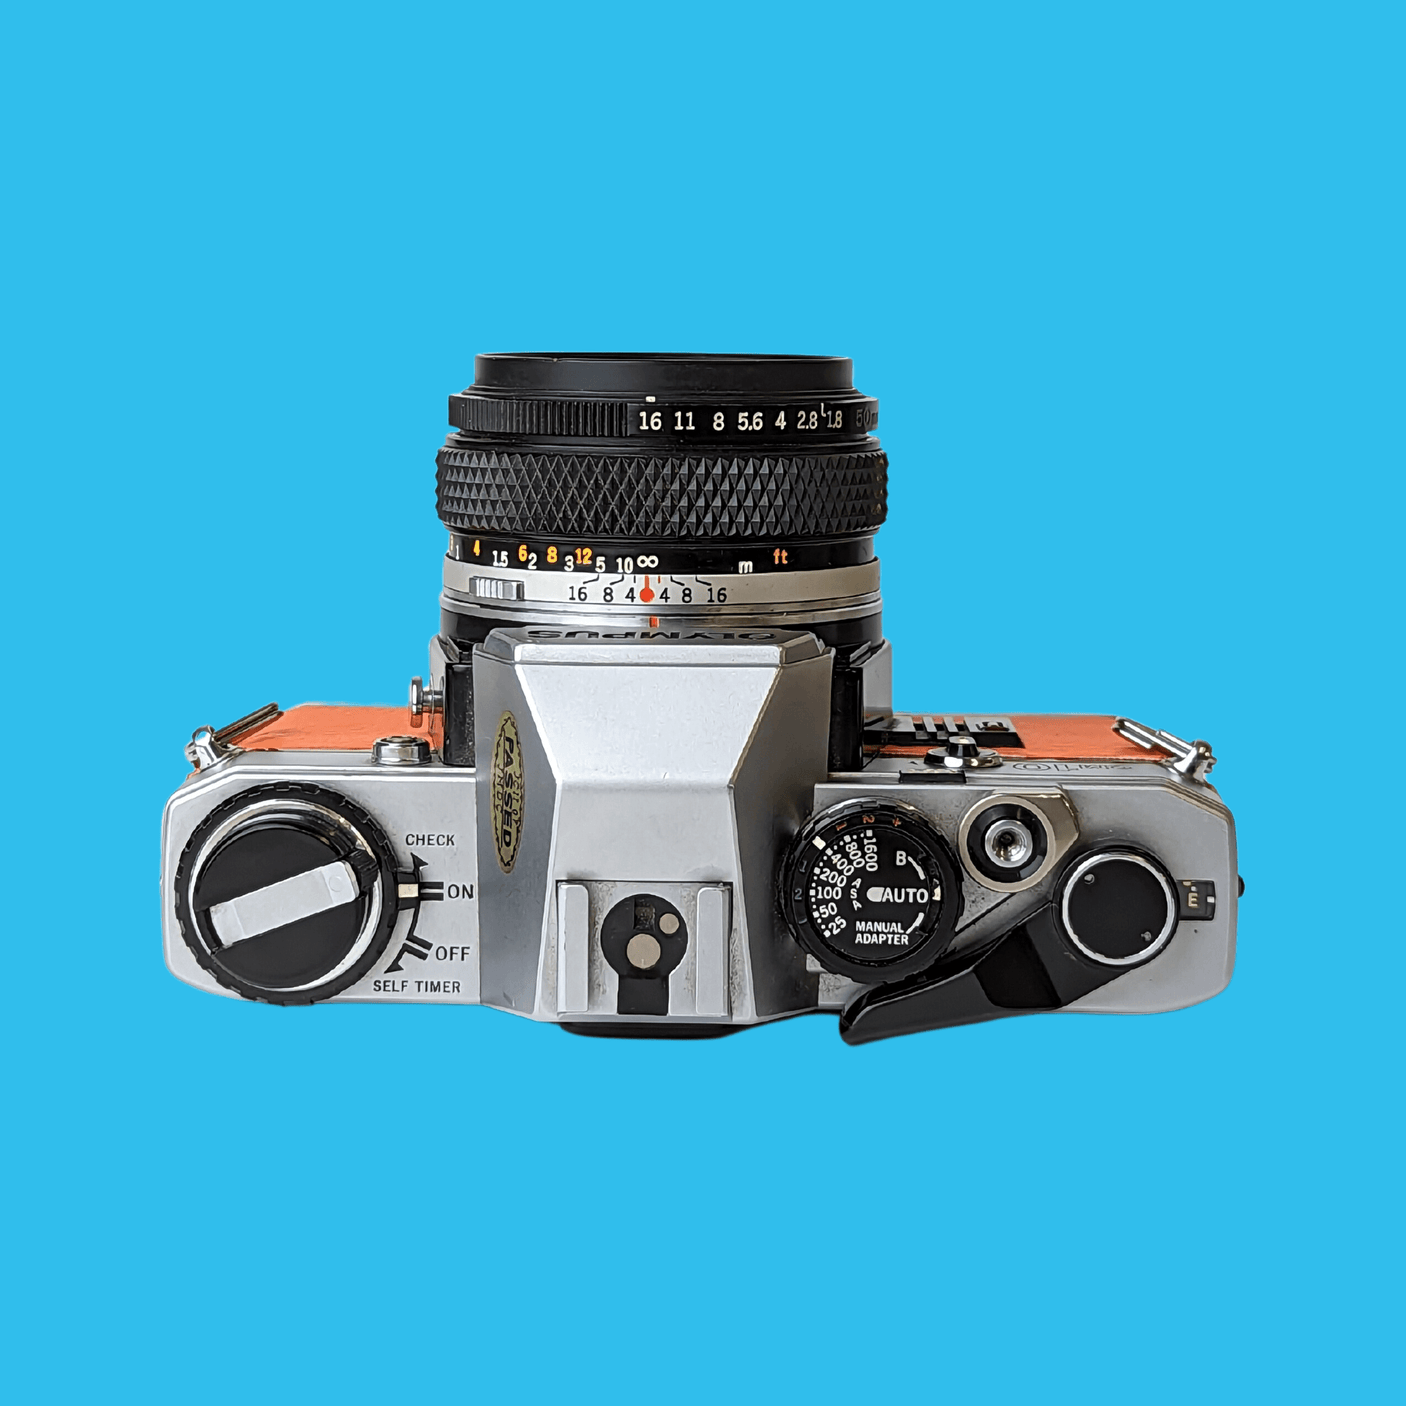
Other cameras automate some of those decisions. The Nikon FG offers Program, Aperture Priority and Manual exposure modes, while the Olympus OM10 was designed primarily around aperture-priority automatic exposure. In normal OM10 operation you select the aperture and the camera chooses the shutter speed; an optional Manual Adapter provides direct manual shutter-speed control. Neither approach is inherently better. Manual control makes the relationship between shutter speed, aperture and exposure particularly clear, while aperture priority can make everyday photography quicker.
How Different Film Camera Shutters Work
Vintage cameras do not all control their shutters in the same way. Mechanically timed shutters use springs, gears and other mechanical components to control exposure duration, while electronically controlled shutters rely on electrical circuits for some or all of their timing. Some cameras combine both approaches or provide limited mechanical settings as a backup. The distinction should not be confused with manual versus automatic exposure: a mechanical camera is not automatically manual in every respect, and an electronic camera does not have to be automatic.
The Nikon FG, for example, uses an electronically controlled shutter while still providing full Manual exposure alongside its automatic modes. We examine these differences in more detail in Mechanical vs Electronic Film Cameras.
There are also different physical shutter designs. Many 35mm SLRs use a focal-plane shutter positioned close to the film, with curtains that travel across the film gate. Leaf shutters, found in various compact, rangefinder and medium-format designs, generally use overlapping blades that open outwards from the centre. You do not need to understand the engineering in detail to take photographs, but the distinction helps explain why cameras can behave differently when using flash.
Bulb, Time and Flash Synchronisation
Many vintage cameras have a B setting, meaning Bulb. This allows the shutter to remain open for longer than the camera's normal timed range, typically for as long as the shutter release is held down. It is useful for night photography, light trails, dark interiors and other situations requiring exposures lasting several seconds or minutes. A tripod and, where appropriate, a cable release help prevent movement during these long exposures.
Some older cameras also provide a T or Time setting. Its exact operation varies by model, but it generally allows the shutter to remain open without continuously holding down the release, before being deliberately closed at the end of the exposure. Because B and T operation can differ between cameras, the individual camera manual is the best guide.
You may also find one shutter speed marked with an X, flash symbol or different colour. This commonly identifies the normal electronic-flash synchronisation speed. With many focal-plane shutters there is a maximum speed at which the entire film frame is sufficiently uncovered when the flash fires. Selecting an unsuitable faster speed can leave part of the photograph obscured by the shutter curtains. The correct sync speed varies between cameras, while leaf shutters can often synchronise flash across a wider range of speeds, so it is better to check the specification for your particular camera rather than assume one value applies to every vintage model.
Shutter Speeds on Older Film Cameras
A vintage camera may now be several decades old, so a shutter-speed setting should not automatically be assumed accurate simply because the shutter fires. Mechanical parts, lubricants, springs, shutter curtains and electronic components can all change with age. Slow speeds may hesitate or stick, while faster speeds can sound convincing without actually providing the exposure duration marked on the dial.
You can identify some obvious problems without specialist equipment. With no film loaded, work through the shutter-speed range and listen for clear differences. A one-second exposure should be noticeably longer than 1/30, while progressively faster settings should become much shorter. Look and listen for sticking, hesitation, inconsistent operation or settings that appear to behave identically when they should be substantially different. This is only a functional check, however; human hearing cannot certify that a shutter marked 1/500 is actually exposing at precisely 1/500 second.
Accurate testing requires appropriate equipment, which is why condition and proper functional assessment matter when buying a vintage camera. Our Film Camera Buying Checklist covers shutter operation alongside the light meter, battery compartment, film transport, lens, viewfinder and other areas worth checking before buying.
Long Exposures and Reciprocity Failure
Very long exposures introduce another characteristic of photographic film known as reciprocity failure. During ordinary exposure times, changing shutter speed and aperture follows the predictable stop relationship described earlier. At sufficiently long exposures, however, many films no longer respond to light in quite the same linear way, and the actual exposure required can become longer than a simple meter calculation suggests.
The amount of compensation depends on the particular film stock, so there is no universal correction to memorise. If you are planning night photography or exposures lasting many seconds or minutes, check the film manufacturer's technical information. For normal handheld photography, reciprocity failure is not something a beginner needs to worry about.
Film Camera Shutter Speed FAQs
Is 1/1000 faster than 1/500?
Yes. One one-thousandth of a second is a shorter exposure than one five-hundredth of a second, so 1/1000 is the faster shutter speed. It allows less light to reach the film but is more effective at freezing fast movement.
Is 1/60 a slow shutter speed?
It depends on what you are photographing. With a standard 50mm lens, 1/60 has traditionally been a useful handheld starting point for a stationary subject. It may be too slow to freeze a rapidly moving subject, but considerably faster than you would choose if you deliberately wanted pronounced motion blur.
What shutter speed should I use with a 50mm lens?
Around 1/60 or faster is a useful traditional starting guideline when handholding a 50mm lens on a 35mm camera. It is not an absolute rule: how steadily you hold the camera and how quickly your subject is moving can both require a faster shutter speed.
Does shutter speed affect depth of field?
Not directly. Aperture is the control that affects depth of field. However, changing shutter speed may require you to change the aperture to maintain the same overall exposure, so the two settings are often adjusted together in practice.
Does changing the ISO dial make my film more sensitive?
No. If ISO 200 film is loaded, changing the camera's ISO or ASA setting to 400 does not physically turn it into ISO 400 film. On most film cameras, the setting tells the light meter which film speed to use when calculating exposure.
Can I use a film camera if some shutter speeds do not work?
You may still be able to take photographs using the functioning speeds, but a faulty or inconsistent shutter limits the camera and can produce unpredictable exposures. A camera being sold as fully working should operate properly throughout its intended shutter-speed range.
What is the best way to learn shutter speed?
Try photographing the same moving subject at several different speeds — perhaps 1/30, 1/125, 1/500 and 1/1000 where the available light permits — while adjusting the aperture to maintain a suitable exposure. Comparing the developed photographs will show you how increasingly fast shutter speeds freeze movement and how slower speeds allow movement to become visible. In practice, this is much easier to understand than simply memorising a list of shutter-speed rules.
Final Thoughts
Understanding shutter speed is one of the points where using a film camera starts to become intuitive. Those initially mysterious numbers on the dial determine not only how much light reaches the film, but how long a moment the camera records. A fast shutter can isolate a fraction of a second that your eyes barely notice, while a slower shutter can show movement and the passage of time in ways that you do not naturally see.
Once you combine that understanding with aperture, film speed and your camera's light meter, you can move beyond simply accepting an exposure and begin deciding how you want the finished photograph to look. If you are choosing your first film camera, our beginner's guide to choosing a film camera can help you decide which type suits you. You can also browse our 35mm SLR camera collection to compare classic cameras with different approaches to manual and automatic exposure.
(FCS-B-099)