
A Beginner’s Guide to Getting Sharper Photographs with a Film Camera
Learning how to focus a film camera can feel surprisingly unfamiliar if most of your photographs have previously been taken with a smartphone or modern digital camera. There may be no autofocus confirmation, face detection or screen that lets you zoom in afterwards to check whether your subject is sharp.
With many classic 35mm cameras, focusing is something you do yourself. You turn the focusing ring on the lens, watch the image change in the viewfinder and decide exactly where you want the photograph to be sharp. Other cameras simplify the process with preset focusing zones, while later film cameras may provide autofocus.
In this guide, we'll explain the main ways film cameras are focused, how split-prism and microprism focusing aids work, what zone and hyperfocal focusing mean, and what you can do when your photographs aren't coming out as sharp as you expected.
How Does Focusing Work on a Film Camera?
Focusing changes the position of optical elements within the lens so that a subject at a particular distance is rendered sharply on the film plane. On a manual-focus lens, this is normally controlled by rotating the focusing ring.
Look at a typical vintage 35mm SLR lens and you will usually see a distance scale marked in metres, feet or both. As the focusing ring turns, those numbers move, indicating approximately how far from the camera the lens is focused.
If your subject is two metres away, for example, the lens might be focused somewhere around the two-metre mark. In practice, however, SLR users don't normally need to measure the distance. One of the great advantages of the single-lens reflex design is that you can look through the viewfinder and focus using the image formed through the taking lens itself.
This is why cameras such as the Pentax K1000 became so popular for learning photography. The process is wonderfully direct: compose the photograph, focus the lens, set the exposure and release the shutter.

Manual Focus, Zone Focus and Autofocus
Not every film camera focuses in the same way. Broadly speaking, a beginner is likely to encounter three approaches.
Manual focus puts the focusing decision in the photographer's hands. You turn the lens until the subject appears correctly focused. Zone focus asks you to estimate the subject distance and select an appropriate focusing range. Autofocus, common on many later film cameras, allows the camera to determine focus electronically.
None is inherently the 'correct' way to use film. They simply provide different shooting experiences, and understanding which system your camera uses is the first step towards getting consistently sharp photographs.
What Is Manual Focus?
On a manual-focus SLR, you rotate the focusing ring until the part of the scene you want sharp appears correctly focused in the viewfinder. Turn past that point and it becomes soft again. With practice, you learn to move backwards and forwards through the point of best focus until the image appears at its sharpest.
It is important not to confuse manual focus with manual exposure. They describe two different things. A camera can require you to focus manually while still controlling part of the exposure automatically.
The Olympus OM10, for example, uses manual focusing but provides aperture-priority automatic exposure in its standard configuration. You focus the lens and choose the aperture; the camera determines the corresponding shutter speed.
If you're also learning what the numbers and markings on a manual-focus lens mean, see our guide to film camera lenses, focal length and aperture.
What Is a Focusing Screen?
When you look through the viewfinder of a traditional 35mm SLR, you are not looking directly at the film. Light entering through the lens is reflected upwards by the camera's mirror and forms an image on a focusing screen.
That screen allows you to judge composition and focus before taking the photograph. When you press the shutter button, the mirror moves out of the optical path and the shutter exposes the film.
Different cameras use different focusing-screen designs, but many classic manual-focus SLRs include one or more visual aids near the centre of the screen. Two of the most familiar are the split-image rangefinder and the microprism.
How Does a Split-Prism Focusing Screen Work?
A split-image focusing aid usually appears as a small circle in the centre of the viewfinder divided into two halves.
When the subject is out of focus, a straight edge passing through the circle appears displaced: the upper and lower sections don't line up. As you rotate the focusing ring, the two parts move towards one another. When they align, the subject at that point should be in focus.
Vertical or clearly defined edges are particularly useful. A window frame, lamppost, edge of a building or door frame can make the split-image effect very easy to see. For a portrait, concentrate on an important facial feature — most commonly the eyes — rather than simply making the general outline of the person appear sharp.
The advantage of the split-image system is that it gives you something more definite to judge than simply asking whether the whole viewfinder image 'looks sharp'. That can be particularly helpful when you are first learning manual focus.
What Is a Microprism Focusing Aid?
Many focusing screens also have a microprism area, sometimes arranged as a ring around the central split-image circle.
When the subject is out of focus, this area can appear to shimmer, break up or sparkle. As correct focus is reached, the image settles down and becomes clearer. This can be useful when the subject doesn't contain a convenient straight line for the split-image rangefinder.
You don't have to use only the central focusing aids. The surrounding focusing screen can also be used to judge sharpness, which becomes useful when your subject is positioned away from the centre of the composition.
Should You Focus Before You Compose?
A practical approach for beginners is to place the important part of the subject over the central focusing aid, achieve focus and then carefully recompose before taking the photograph.
For most everyday photographs this works well. Be more careful at very close distances and wide apertures, however, because depth of field can become shallow enough for significant recomposition to affect critical focus.
Why Aperture Matters to Focusing
Focusing and aperture are closely connected because aperture influences depth of field: the range of distances in a photograph that appear acceptably sharp.
A wide aperture such as f/1.8 can produce relatively shallow depth of field. This can beautifully separate a subject from the background, but it also gives you less margin for focusing error. At a smaller aperture such as f/8 or f/11, depth of field is generally greater, allowing more of the scene in front of and behind the precise focusing distance to appear acceptably sharp.
Focal length, subject distance and the intended viewing conditions also influence perceived depth of field, so aperture shouldn't be considered in isolation.
If you want to understand how aperture works alongside shutter speed and film speed, see our guide to the exposure triangle.
What Is Zone Focusing?
Not every film camera is focused by looking through an SLR focusing screen. Some cameras use zone focusing, where you select an approximate subject-distance range rather than visually confirming precise focus through the taking lens.
The Olympus Trip 35 is a classic example. It provides four zone-focus settings represented by symbols, allowing the photographer to select an appropriate range for subjects from close portraits through to distant scenery.
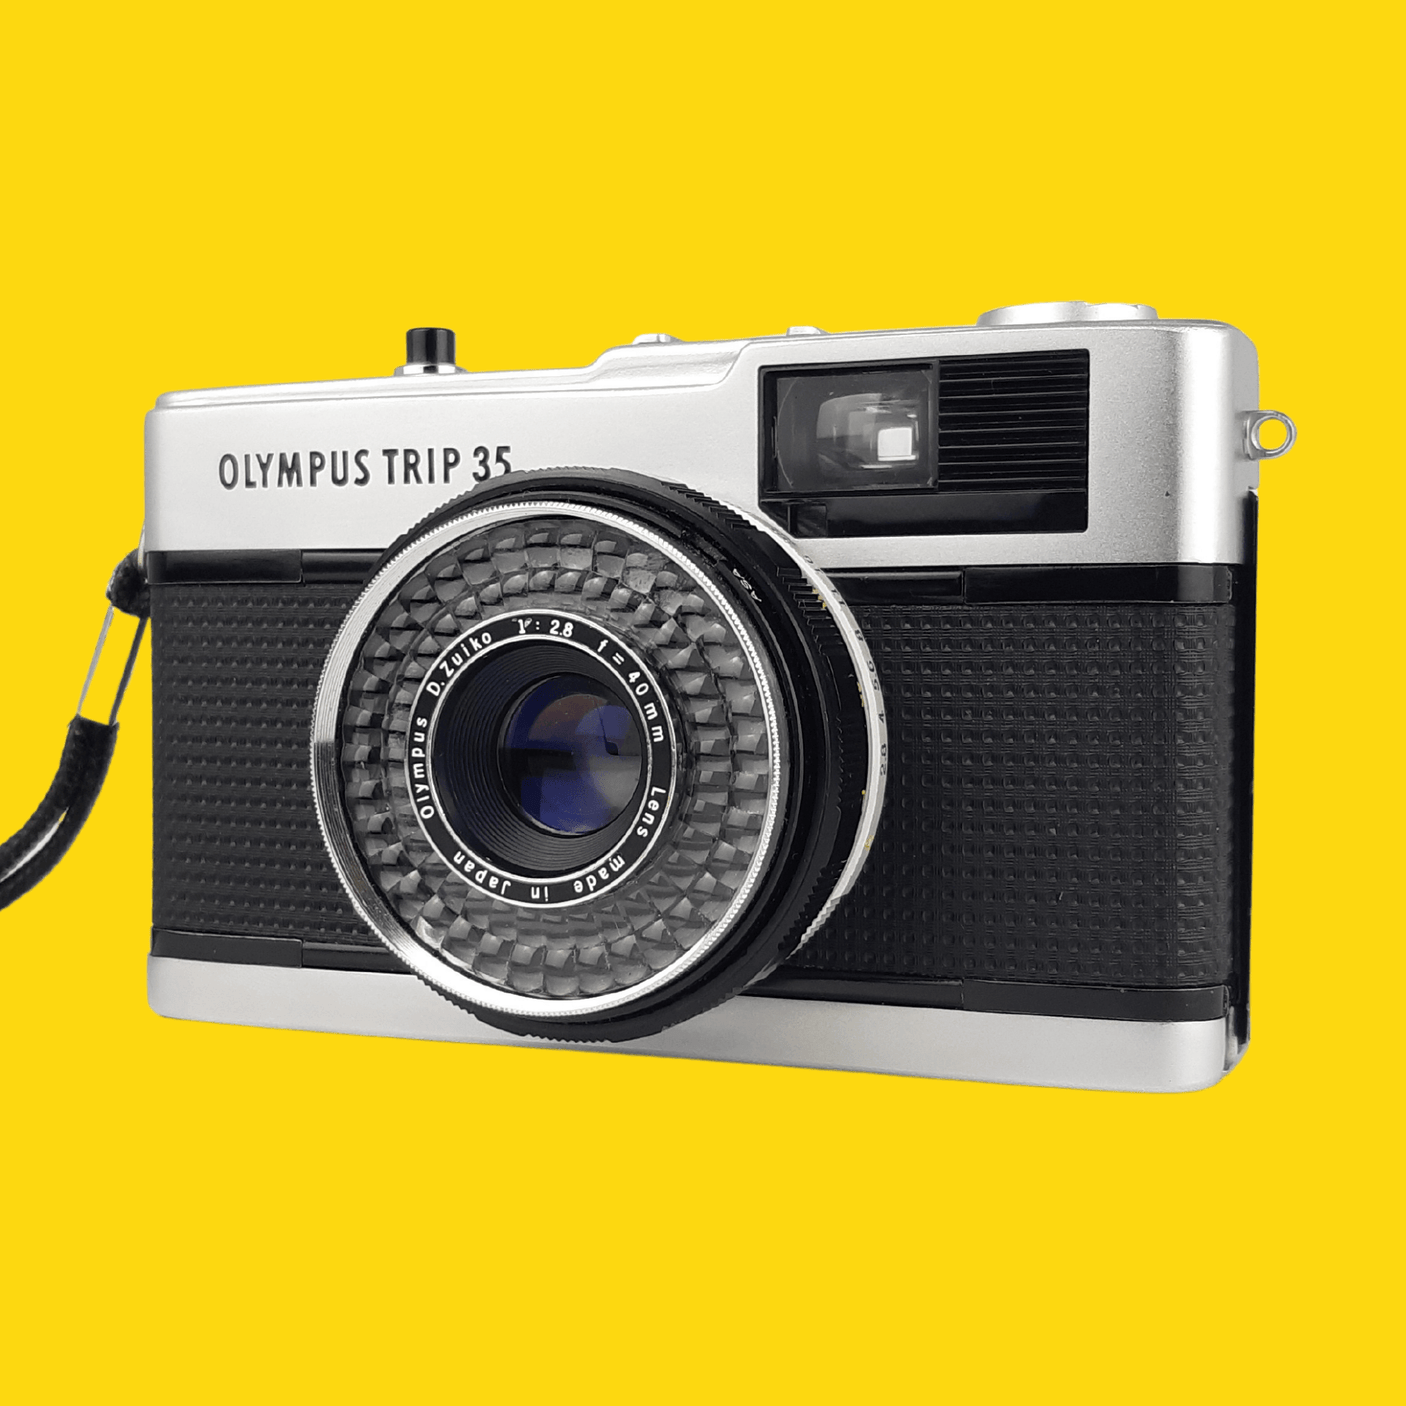
Zone focusing may sound crude compared with modern autofocus, but in suitable conditions it can be remarkably quick and effective. Instead of waiting for a camera to find a subject, you can set an appropriate distance zone in advance and take the photograph when the moment arrives.
This makes the technique particularly well suited to travel, street photography and candid photographs where speed can matter more than pinpoint focusing on a static subject.
Using a Lens Distance Scale
Manual-focus lenses often provide more information than just the current focusing distance. Many also include a depth-of-field scale around the focus index.
The markings can help you estimate how much of the scene should appear acceptably sharp at different apertures. At a smaller aperture, for example, the depth-of-field markings indicate a broader distance range than they would at a wide aperture.

This is particularly useful when you don't want to focus separately for every photograph. Street photographers have traditionally used distance and depth-of-field scales to prepare a camera before a subject even enters the frame.
Not every vintage lens provides the same scale, and the markings are an aid rather than a guarantee of absolute sharpness. Nevertheless, learning what the numbers mean turns what initially looks like a collection of mysterious markings into a genuinely useful photographic tool.
What Is Hyperfocal Focusing?
Hyperfocal focusing takes the same principle further. Instead of automatically focusing a landscape at infinity, you focus at a distance chosen to maximise the range of acceptable sharpness extending towards infinity.
It can be useful for landscapes, architecture and other situations where you want considerable depth in the photograph. Beginners don't need to calculate hyperfocal distance every time they pick up a film camera, however. The more useful lesson is simply that focusing at infinity isn't always the best way to make as much of a scene as possible appear sharp.
As your understanding of aperture and depth of field develops, the distance scale on a manual lens becomes increasingly useful.
How to Focus a Film Camera in Low Light
Manual focusing becomes more difficult when the viewfinder image is dark. The split-image and microprism aids that are obvious outdoors can become harder to read when there is little light or contrast.
Look for a well-defined edge at roughly the same distance as your intended subject. Streetlights, illuminated signs, window frames and areas of contrasting light can all provide something easier to focus on. A lens with a relatively wide maximum aperture can also provide a brighter viewfinder image on many traditional SLR systems.
Take your time where the subject allows it. A second spent confirming focus can be considerably more valuable than discovering a soft photograph after the film has been developed.
Why Are My Film Photos Still Blurry?
One of the most useful lessons to learn is that a blurry photograph isn't necessarily an incorrectly focused photograph.
If nothing in the frame appears properly sharp and the image shows directional movement, the problem may be camera shake. If the background is sharp but a moving person, animal or vehicle is blurred, the shutter speed may have been too slow to freeze the subject. Those are movement or shutter-speed problems rather than focusing errors.
Conversely, if something behind or in front of your intended subject is beautifully sharp while the subject itself is soft, the lens was probably focused at the wrong distance.
This distinction tells you what to change next time. Faster shutter speeds can help with camera or subject movement; more careful focusing helps when the plane of sharp focus is simply in the wrong place.
Vintage equipment condition can occasionally contribute as well. A damaged or incorrectly seated focusing screen, optical problems in the lens or other alignment issues can affect results. Our used film camera buying checklist explains some of the things worth checking when assessing an older camera.
Practical Tips for Sharper Manual-Focus Photographs
Start with a subject that isn't moving. Look through the viewfinder and deliberately turn the focusing ring too far in both directions. Watching the subject move from blurred, through sharp and back to blurred again helps you recognise the point of best focus.
Use a strong edge when practising with a split-image screen and pay attention to texture when using a microprism. For portraits, concentrate on the eyes. If you're using a particularly wide aperture, be more precise because the available depth of field may be shallow.
Don't forget shutter speed. Perfect lens focus cannot compensate for camera shake or a subject that moves significantly during the exposure. If you're unsure how shutter speed affects sharpness and movement, see our guide to film camera shutter speeds.
Most importantly, practise before an important occasion. Manual focusing quickly becomes intuitive and, like advancing the film or setting exposure, becomes much easier once your hands know what to do.
Is Manual Focus Difficult to Learn?
Usually, no. It is simply unfamiliar.
The first few times you use a manual-focus film camera, you may find yourself repeatedly checking the focusing ring and wondering whether the image really is sharp. After some practice, the process becomes much more natural.
There is also something satisfying about knowing that the camera didn't choose the subject for you. You decided what mattered in the frame and placed the focus there yourself.
For anyone wanting to learn the fundamentals of photography, that direct involvement is one reason classic manual-focus SLRs remain so appealing. You can browse our 35mm SLR film cameras or read our beginner's guide to choosing your first film camera if you're deciding where to start.
Film Camera Focusing FAQs
How do I know when a manual-focus film camera is in focus?
On an SLR, watch the subject through the viewfinder while turning the focusing ring. A split-image focusing aid should align when focus is correct, while a microprism area becomes clearer and stops shimmering. You can also judge sharpness on the surrounding focusing screen.
What is the circle in the middle of a film camera viewfinder?
On many manual-focus SLRs, the central circle contains focusing aids such as a split-image rangefinder and microprism. Their purpose is to make accurate manual focusing easier.
What is zone focusing?
Zone focusing means selecting an approximate subject-distance range rather than visually confirming precise focus through the taking lens. Cameras such as the Olympus Trip 35 use this approach.
Does a smaller aperture make focusing easier?
A smaller aperture generally increases depth of field, giving you a greater range of distances that appear acceptably sharp. It doesn't correct badly placed focus, however, and reducing the aperture also affects exposure.
Why are my photographs blurry even when they looked focused?
Blur can come from several sources. Incorrect focus is one possibility, but camera shake and subject movement are also common causes. Looking at which parts of the photograph are sharp can help identify what went wrong.
Do all film cameras use manual focus?
No. Many classic SLRs and rangefinders are manually focused, some cameras use fixed or zone focusing, and later film cameras frequently include autofocus. The focusing system depends on the particular camera.
Final Thoughts
Manual focusing is one of those film-photography skills that sounds more difficult than it really is. A focusing ring, a viewfinder and a simple visual aid can give you remarkably precise control over which part of your photograph is sharp.
Start by learning to recognise correct focus through the viewfinder. Then explore how aperture changes depth of field, how distance scales can help you work more quickly and, eventually, how techniques such as zone and hyperfocal focusing can let you prepare a photograph before the subject is even in front of the camera.
The goal isn't simply to avoid blurry photographs. It is to understand that focus is a creative decision. Once you control it yourself, you decide exactly where the viewer's attention should fall.
Ready to put it into practice? Explore our 35mm SLR film cameras and discover a classic camera that lets you experience manual photography for yourself.
(FCS-B-101)