How to choose film for your camera?
So, after months of living in your parent’s basement you’ve decided to finally get some of that sweet Vitamin D that you hear all the cool kids talking about. But just before you tackle the wilderness, you’re met with a deep unearthing pain and no we’re not talking about that curry you were warned about. What film do you use?
Deciding what film you use can be a big commitment because once it’s in there you could be stuck with it for 37 frames, and a marriage counsellor ain't cheap.
There are three types of film to choose from, Colour film, Black and White film, and Slide film. All of these are great film stocks and have their own purpose in the world, but none of these are perfect, we all have our own flaws. There are trade-offs when it comes to using certain film stocks there are things to consider before making the commitment. Here are just some things to consider.
- Latitude.
- Weather/Time of day.
- Film speed.
- Amount of grain.
- Colour or black and white
- Budget.
Understanding the different types of film.
So, before we get into the technical stuff, it's best to understand the different types of film.
Colour film.
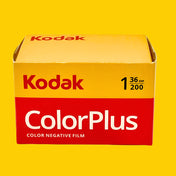
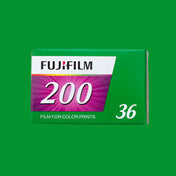
Most people seem to be more familiar with colour film, as it tends to be the “go to” choice when it comes to shooting film. Colour film can be a great all round film stock, with fine grain and an ASA (ISO/light sensitivity) ranging from 100ASA to 800ASA at box speed. One thing to consider when choosing colour film is the overall tone of the film, this can be shown by the colour on the film canister. For example, Kodak Portra tends to be a very warm film stock with a prominent yellow/red cast, so the canister is yellow. Fuji Films tend to be more on the colder side of the spectrum, with a high emphasis on green and blue tones making tree’s, shrubbery, and landscapes pop. This is shown by the canister being green.

Slide film.
Slide film or more commonly known as positive/reversal film, gives a positive image instead of a negative image. What does this mean? Instead of having a negative, to then print as a positive. Slide film is already a positive, so each frame is like a tiny little print. Slide film isn’t very light sensitive, with an asa ranging from 50 to 100. Because it's low asa it’s not the most versatile film or the most forgiving, as there isn’t much exposure latitude compared to negative film. So, you need to make sure you’re metering accurately. So why would you use Slide film? Well, slide film has always been a favourite amongst photographers for its vibrant colours and being visually true to life, it was also a lot simpler to have compared to negative film. There was no need to print and frame your pictures to view them, all you needed to do was add a little light and you’d have an instant projection of the image. Unfortunately, despite a continuous outcry for Slide film, a lot of film manufactures simply refuse to reproduce these film stocks now as the developing procedure needed for the film is no longer readily available as it once was.

Black and white film.
black and white film is as you can guess, a black and white film stock that takes colours and converts them into a series of blacks, whites, and greys. Black and white film comes in a variety of different film stocks, all with their own personality. overall, it's very versatile, with capabilities to be pushed at 64,000ASA! Although I must say I don’t recommend this unless you want what I can only describe as a grainy black blob. Black and white film dates to the first ever produced photograph in 1825. It wasn’t until roughly the mid1930’s/40’s for colour film to come along but even then, black and white film continued to be the photographer’s choice. But why? Well, some of the reasons behind this are because black and white was more professional and it carried the “classic” photographic look. It was also much cheaper compared to colour film, but what separated black and white film from colour film was its latitude.

Things to consider when choosing a film stock.
So now that we’ve gone over the different types of film, here are a few things to consider when choosing a film stock.
Latitude.
What is latitude and why is it important? Latitude is a way of understanding how versatile/forgiving your film is, how far can you push and pull, or how far can you under and over expose your film and still achieve usable results. Or in simpler terms, how much you can abuse your film and it’ll still come back to you.
pushing or pulling film in double increments. For example, a 400 asa film can be pushed to 800asa or pulled to 200asa and so forth. This is done when developing the film, so if you do decide to push or pull your film make sure to leave a little note for your film lab technician. or under and overexpose the film and still achieve usable results. Or in simpler terms, how much you can abuse your film and it’ll still come back to you.
Why is this important? Well, it's always important to understand the film you’re using so you can understand what results you’ll get in certain situations. if you come to know your film well enough, you’ll be able to almost see the world the same way your film does. This will help you to pre-visualize the outcome.
It’s important to understand that certain film stocks have a greater or lesser latitude than others. For example, slide film has a zero tolerance for error, so it is critical for you to make sure you are metering your film correctly. If you are going to shoot slide film, it is advised to shoot a test roll or two, this way you can get a greater understanding of how the film will work in certain situations.
Colour negative film can tolerate vast amounts of over exposure and still produce usable results, so if you find yourself needing faster film speeds pushing the film isn’t a bad idea. But I must warn you that it tends to mute your negatives, leaving it looking rather flat with the highlights blown out, but in recent years this has come to be the latest trend when shooting colour film. But if you do find yourself accidently overexposing your film this can always be fixed in post. On the other hand, if you underexpose colour film, then you tend to be left with this grainy contrasty mess. Colour film doesn’t hold up well in low light situations, so bear this in mind if you’re chasing sunlight.
Black and white films are awesome... There I said it (this blog is completely unbiased) it’s not a trade secret that black and white film is one of the more versatile film stocks. it can handle whatever you throw at it, and it’ll still produce incredible results.
You can push the asa well over its designated box speed, and still retain highlight and shadow detail. One thing I must note is, that the higher you push black and white film, the more contrasty and grainier it will be.
Film speed.
Film speed is determined by the asa (also known as iso) number on the film canister/box. This number can range between 50 to 32,000 asa. The higher the number, the more sensitive the film is to light, or how fast it’ll be in regards to shutter speeds and F-Stops. A lower asa will mean it is less sensitive to light, meaning lower shutter speeds and F-stops.
Faster films (800-64,000 ASA) will allow you to shoot film faster in low light situations. The downfall from this will be that your negatives will have more contrast and grainie (in digital terms this is known as noise). Although depending on whether your shooting colour film or black and white, can be the deciding factor for how well your images can perceive a lot of grain.
Slower films (50-400 ASA) typically tend to have a cleaner look to them (less grain) and some argue to be more sharper. The trade-off here is exposure time, your film will need slower shutter speeds and lower F-Stops to assure you are correctly exposing your negatives. Bear in mind that you will most likely need a tripod if you’re chasing light, because anything below 1/60th of a second can no longer be handheld. Using a tripod can be great if you’re working with landscapes but could be problematic if you need to work in a fast-paced environment.

Budget.
You may or may not be aware that analogue film is currently going through a resurgence in popularity, which is great as there is an ever-growing need for film. But, with that comes rising prices making it more expensive to be a film photographer. Not all hope is lost, there are ways you can save money. Now we know people tend to shoot more colour film lately and because of this its Portra this, Portra that, blar blar blar. Yes, it is a great film stock that can produce beautiful results, but prices are starting to reach close to the £20 mark for one roll of film, which is mighty expensive considering it wasn’t that long ago you could get a roll for roughly £12.
Porta is marketed as professional film, but there are more beginner/budget friendly film stocks out there that are still very capable, great film stocks when compared to kodak portra.
Here are a few cheaper alternatives for shooting colour film.
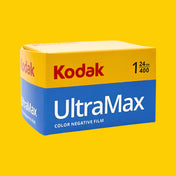
- Kodak ultramax
- Kodak colour plus
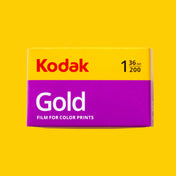
- Kodak Gold
- Lomochrome colour
- Fujicolour C200
- Fujisuperia
Another alternative for budget saving, is to use expired films. Now with shooting expired film there are quite a few trade-offs to this, the main one being the asa (iso) losing its sensitivity through the years. The rule of thumb when shooting expired film is for every decade its expired you need to add an extra stop of light. So, let’s say you’ve got some kodak film at 400 asa that expired in 2010 you should then rate the film at 200 asa.

There are also lab fees you’ll need to think about if you want to get your film developed. Although getting your film developed can be relatively inexpensive if you don’t tend to use film that much. Lab fees can vary in price depending on what you want from your lab, the most common process being ‘develop and scan’ which can cost roughly between £8-£12.
Saving money with development will vary depending on how much film you use. If you only tend to use a couple of rolls a month, it's best to send your film off to a lab. But, If you tend to go through rolls of film weekly, then I’d suggest looking at home developing. Home development at first can be quite scary and costly at first, as there’s quite a bit of equipment needed to get yourself up and running. But it’s a great way to save yourself some money, feel closer to your craft, understand film better and you’ll have complete control over how your negatives look.

Now, Drum roll please… the best way to save money with film in my opinion is to just imply shoot black and white (again this is a completely unbiased blog, I promise). Black and white film is so much cheaper compared to colour film, with rolls of film averaging between £6 - £8 per roll, that’s less than half for colour film. But wait, there’s more! It’s cheaper to develop as well, with lab prices ranging between £5 - £8. Oh, and for the final cherry on the cake, if you were to start developing your negatives at home, black and white developing is not only cheaper, but also a much easier process than C-41 developing (colour developing) making it perfect for beginners.

Colour or black and white?
As we move forward with this blog, we’ll be going over more opinion-based subjects. These are purely here to give you guidance and something to think about.
When it comes down to deciding colour over black and white, typically the decision will be made because you like one over the other. Now we’re not saying that there is anything wrong with that, but it helps to understand how one can work better than the other in certain scenarios.
Black and white or colour? On the surface this seems like a relatively straightforward question, but unfortunately this isn’t the case. So, something to consider when deciding what film to use for your intended subject matter, is how will colour or black and white help the viewer to see your narrative? When we try to speak through our art it seems that the best way to do this will be to show something quite literal. But it is important to note that when we show off our work, we can already see the intended subject matter because we chose it, so we already know where to look, the viewer on the other hand doesn't know this. This is where you can decide if colour adds to your narrative or is it a distraction? Here you could use black and white to help mute the image. This decision along with composition etc, can be the difference between a great photo or just another postcard. Your colour choice can really help to push your narrative across to the viewer. For example, black and white works are great for a minimalist composition, as this can help to highlight key points of interest, mute certain areas of the compositions and draw the viewer through the photograph.
Time of day/weather.
Unfortunately, there is no definite answer when it comes to deciding film stocks, the only real answer is to go out and find out what works best for you. But what I can do is offer guidance. Hopefully this will give you something to reference.
So, sometimes I like to try and get my life together by choosing my film stock based on either the weather, time of day or time of year.
Sunrise.
Sunrise produces a soft golden glow, because of this I tend to shoot colour film to catch those golden tones. On the other hand, sometimes I like to feel reckless, so I’ll shoot black and white film to try and make the most of the softer lighting. I tend to do this more for my landscape work.
Mid-day.
Mid-day tends to be the worst time of day to try and shoot, as all you have to work with is harsh contrast lighting that lacks vivid colours. So, for this i'll use kodak gold for its lower asa to try and compensate for the harsh lighting. Another one to try is Fuji Pro 400H, Fuji films are known for having a prominent green and blue colour, this helps to try and bring back some colour back into your negatives and works especially well if you're shooting greenery or landscapes. Another good option to try is black and white film as it tends to work well in the majority of situations, but for this I like to either use a red or orange filter to try and bring back some definition in the highlights.
Overcast.
Overcast is an interesting one because although it may look boring and flat, you can still render some incredible results. For me Ilford HP5 pushed two stops (1600asa) works well to counteract the low light conditions. The rough grainy, contrast look works well to add some character to your negatives
Foggy/Rainy day
Black and white for me is a must for moody conditions such as these, especially Ilford HP5 pushed two stops (1600asa). Like overcast, the rough, grainy contrast look works well to add some character to your negatives.
Sunset/Blue hour.
Sunset is pretty much the same as sunrise for me. The only difference being if you can get hold of some Kodak ektachrome then I highly recommend you use it. Ektachrome is well known for having a vivid blue cast, so this works well paired up with blue hour, giving your negatives some extra pop. The only thing to bear in mind with this is that ektachrome isn’t the most forgiving, with it only being a 100asa film stock you will have to be very critical with your metering.
Night.
Night photography really comes into its own, giving you the opportunity to an entirely different world, allowing you to see different compositions compared to if you were to shoot in the day. Now it's no trade secret that the Cinestill 800T works really well at night if shooting neon lights or petrol stations with funky lights halation is your thing. But if that’s not your thing, then Kodak portra 800 also works exceptionally well, just minus the funky light halation’s. Another favourite of mine is Ilford HP5, there’s just something you’ve got to love about that black grainy blob look.
|
Time of day/Conditions. |
Film stock. |
|---|---|
|
Sunrise/Golden hour |
|
|
Mid-day. |
|
|
Overcast. |
|
|
Foggy/Rainy day. |
|
|
Sunset/Blue hour |
|
|
Night. |
|